Tag: stable diffusion

  • 使用微軟的 DirectML Extension for Automatic1111 SD WebUI 加速 SD v1.5 的圖像生成速度

    使用微軟的 DirectML Extension for Automatic1111 SD WebUI 加速 SD v1.5 的圖像生成速度

    目前測試預設的 SD v1.5 和 SD v1.4 可以正常的運行,而且算圖速度明顯快上不少;SD v2 可以跑最佳化,但是算圖時會發生錯誤。

    以下為環境建置方式:

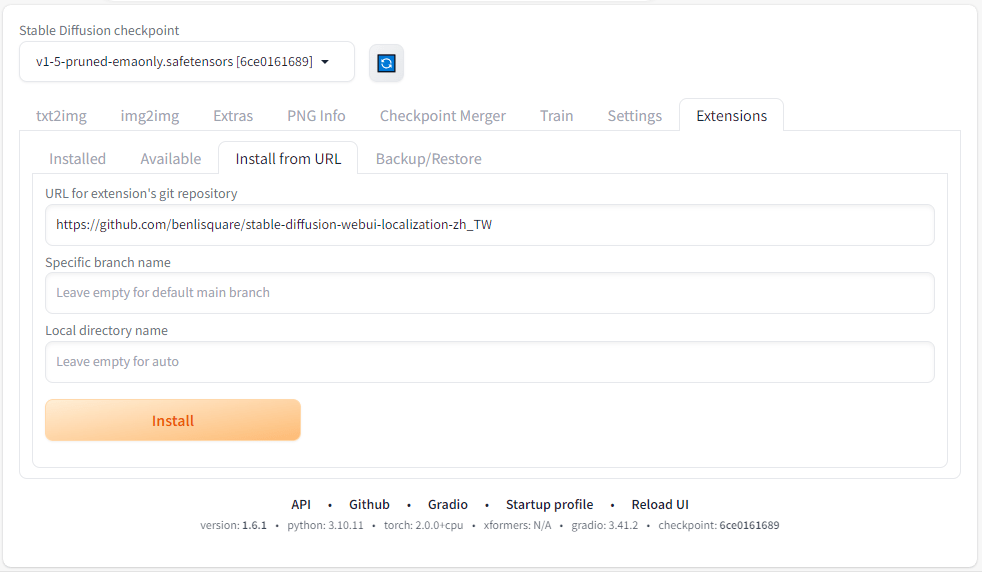
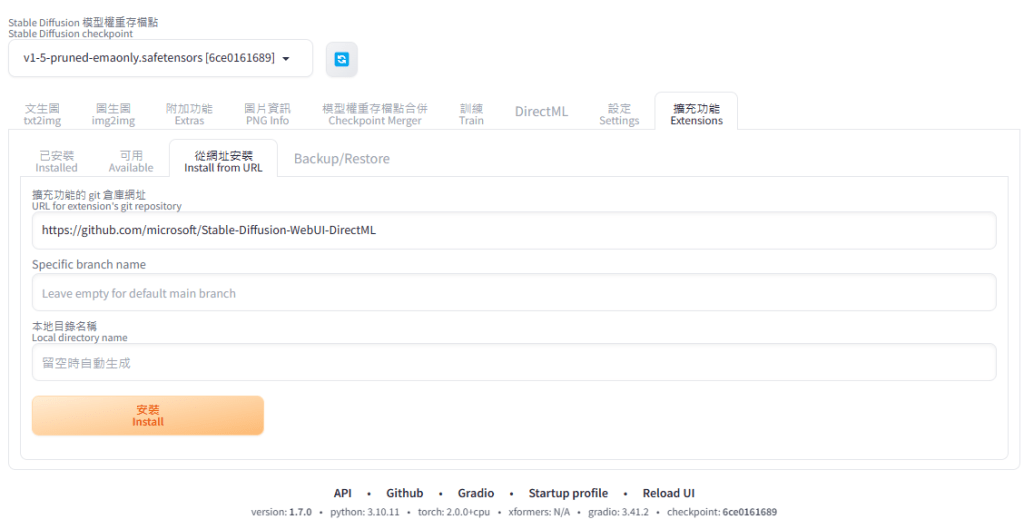
    1. 於擴充功能頁籤從網址安裝:https://github.com/microsoft/Stable-Diffusion-WebUI-DirectML

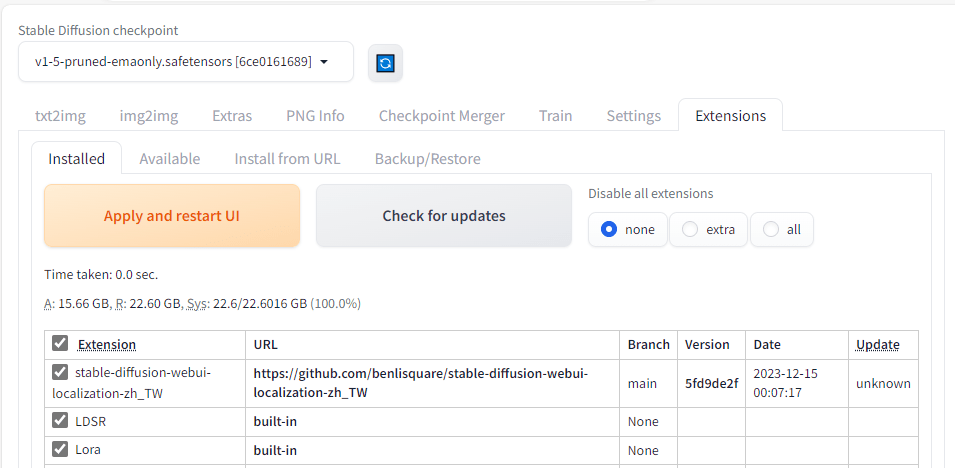
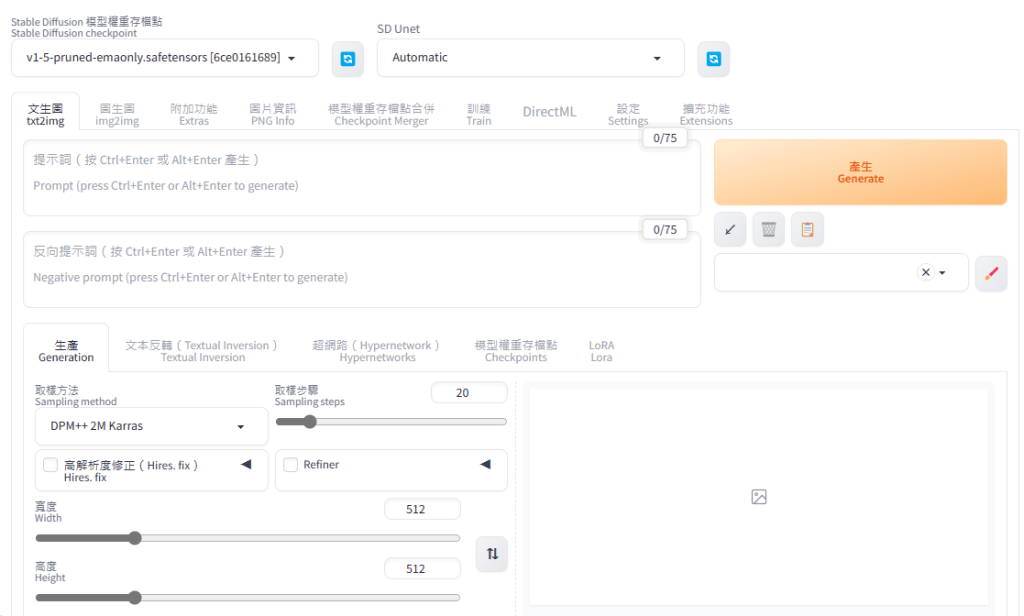
    2. 重啟UI完成安裝後,在[Settings 設定] –> [User Interface] 的 [Quicksettings list 快速設定列表],加入 “sd_unet”,套用設定並重新載入UI以啟用 SD Unet 選擇介面。

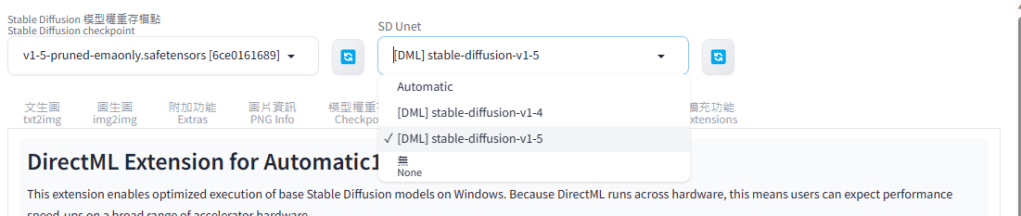
    3. 目前 SD Unet 選單內還沒有模型可以選擇,請切換到 [DirectML] 頁籤,這裡是官方對於該擴充功能的說明,以及運行所需要的套件資訊。

    4. 參考說明的 Getting Started 第 1. 點,照著說明便可對直接對官方選用的 SD v1.5 和 SD v1.4 模型進行最佳化。

    5. 經過最佳化的模型放: \olive\examples\directml\stable_diffusion\models\optimized\runwayml\stable-diffusion-v1-5\unet\

    6. 將其複製到 Stable Diffusion Web UI 的 \stable-diffusion-webui-directml\models\Unet-dml\ 目錄下,並將檔案重新命名成有代表性的名稱。

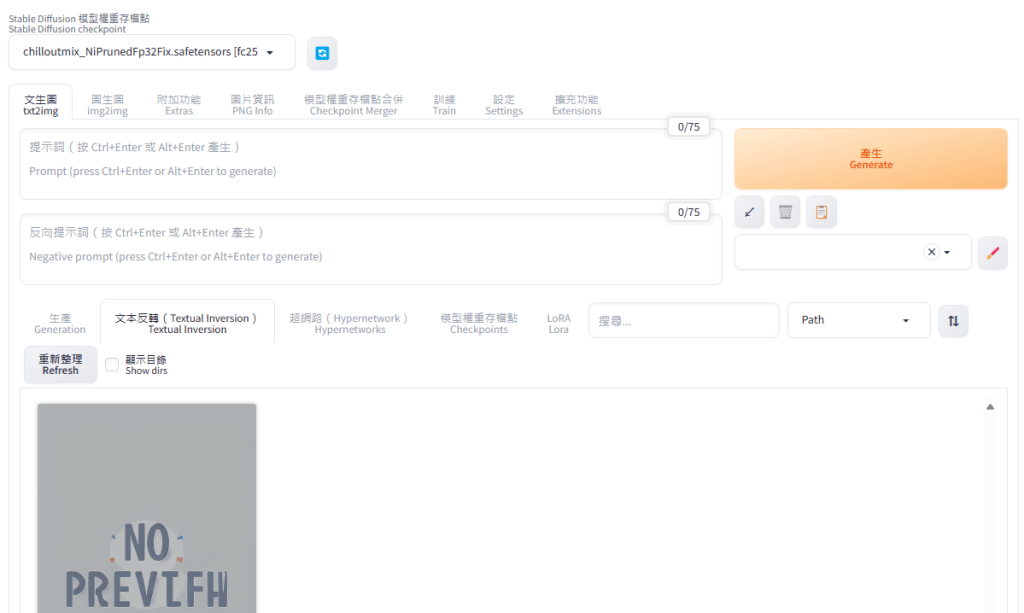
    7. 點選 SD Unet 選單旁的重新整理按鈕,便能選取以運用之。

    注意事項

    1. 如果在使用Olive的DirectML for Stable Diffusion範例最佳化模型時出現:
      ERROR:onnxruntime.transformers.optimizer:There is no gpu for onnxruntime to do optimization
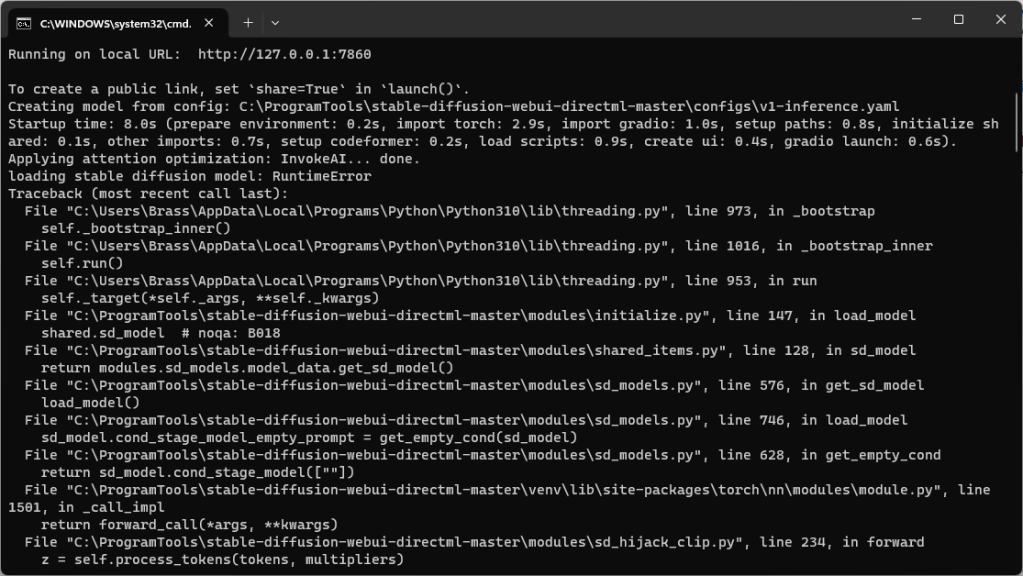
      截至目前算是正常現象,因為Olive還沒支援在 DmlExecutionProvider 使用GPU跑最佳化。
    2. 如果是使用 Stable Diffusion Web UI DirectML,啟動參數的 –use-directml 必須拿掉,否則沒辦法正常執行。
  • Stable Diffusion – 修改 Default 預設值

    Stable Diffusion – 修改 Default 預設值

    Stable Diffusion Web UI 的 UI 和 算圖相關的設定,分別放在根目錄的 ui-config.json 和 config.json,編輯前者便能要修改 UI 上的預設值如常見的圖像寬高、取樣方法、步驟… 等等。(與 Stable Diffusion Web UI DirectML 通用)

    以修改txt2img文生圖的Width寬度預設值為例,用記事本等文字編輯器打開ui-config.json後搜尋”txt2img/Width”便能查到該預設值(相同關鍵字的參數大部分都放在一起,要人工查找也是可以),編輯存檔後即可。如果想要驗證確認,除了Stable Diffusion關閉重開外,也可以點選[設定 Settings]的[重新載入UI Reload UI]來快速生效。

  • Stable Diffusion – 中英雙語介面設定

    Stable Diffusion – 中英雙語介面設定

    Stable Diffusion 原生為英文介面,雖然技術單字固定,但若是有熟悉中文的還是比較方便操作。

    好在它本身就能透過 extension 擴充支援的語系,並可以進行切換,再搭配大神們提供的雙語介面擴充,便能打造無語言障礙和語意誤解的操作環境。

    建立步驟如下:

    1. 切換到「Extensions」頁籤的子頁籤「Install from URL」後,於「URL for extension’s git repository」欄位輸入 benlisquare 的 git 專案連結:https://github.com/benlisquare/stable-diffusion-webui-localization-zh_TW,再按下「Install」按鈕。

    2. 安裝完成後,「Install」按鈕下方會有安裝完成的提示。

    3. 接著如提示所指引的,到「Installed」頁籤,按下「Apply and restart UI」以生效擴充功能。另外,剛剛安裝的擴充也可以在下面的已安裝清單中找到。

    4. 重啟生效後,便能在「Settings」頁籤的「UI Interface 」的 「Localization 」多語系選項中切換成中文。不過由於我們還要使用雙語擴充套件,故這裡要保持為 none。

    5. 切換到「Extensions」頁籤的子頁籤「Install from URL」後,於「URL for extension’s git repository」欄位輸入 journey-ad 的 git 專案連結:https://github.com/journey-ad/sd-webui-bilingual-localization,再按下「Install」按鈕。

    6. 同之前的步驟,UI重啟生效後切換到「Settings」頁籤,並在很下面的設定項目中點選「Bilingual Localization 」選項

    7. 「Localization file」選擇 zh_TW 》Apply settings〉Reload UI 即可

    8. 雙語介面👍

  • Stable Diffusion – Web UI 資料夾結構說明

    Stable Diffusion – Web UI 資料夾結構說明

    以下為 Automatic1111 的 Stable Diffusion Web UI 各資料夾用途的說明(原則上與 Stable Diffusion Web UI DirectML 通用)

    • \embeddings 用來放置輔助提詞檔案( .pt 或 .safetensors),比方說反向提詞的 EasyNegative.safetensors,在反向提詞的地方輸入 easynegative 便能套用
    • \models 所有AI模型放置的位置
      • \models\Stable-diffusion 用來放置已訓練好的 Stable Diffusion 繪圖模型存檔點 checkpoint 的檔案(.safetensors),這也是整個AI繪圖最主要使用的模型。可以在主畫面左上方選單取用
      • \models\VAE 用來放置可針對生成圖像的細節如臉部、手部等做調整修正的 VAE 模型(.safetensors),在設定 settings > Stable Diffusion > SD VAE 選單取用
        (VAE, Variable Auto Encoder)
      • \models\LoRA 用來放置可以對既有模型做風格調整的 LoRA 模型(.safetensors),在提詞的時候可以直接使用
        (LoRA, Low-Rank Adaptation of Large Language Models)
      • \models\ESRGAN 用來放置圖像放大相關演算法的模型(.pth),可以在附加功能 Extras 的放大演算法選單中取用
        (ESRGAN, Enhanced Super-Resolution Generative Adversarial Networks)
    • \extensions 安裝的擴充套件套件會放在這,如果要完全刪除下載安裝的擴充套件,停用套件後可以在這裡刪除
    • \extensions-builtin 內建的擴充套件存放路徑
    • \localizations 各自定義語言包存放的位置(如果是透過擴充套件安裝的語言包,則依然存放在擴充套件對應的資料夾而不會放在這裡)
    • \outputs 存放輸出的圖片
  • Stable Diffusion Web UI DirectML 啟動參數

    Stable Diffusion Web UI DirectML 啟動參數

    最近透過 git 更新了目前最新的 stable-diffusion-webui-directml ,發現突然不能用了@@!

    經查閱專案的上的討論才發現現在必須要在 webui-user.bat 檔案內的 set COMMANDLINE_ARGS= 部分,加入忽略 CUDA 檢查的參數和使用 DirectML 的參數,才能夠正常開啟使用。另外,由於CPU和部分GPU不支援半精度運算,建議要加上不要使用半精度運算的參數:

    --skip-torch-cuda-test --use-directml --no-half
  • 解決 Stable Diffusion 出現的 Connection errored out.

    解決 Stable Diffusion 出現的 Connection errored out.

    使用 AUTOMATIC1111 提供的 Stable Diffusion 方式時,如果有出現 connection errored out 並導致無法正常運作。通常是因為 proxy 導致。

    以 Ngnix 為例,參考 Gradio 的指南設定 proxy 即可解決問題。

    https://www.gradio.app/guides/running-gradio-on-your-web-server-with-nginx

    
    #user  nobody;
    worker_processes  1;
    
    #error_log  logs/error.log;
    #error_log  logs/error.log  notice;
    #error_log  logs/error.log  info;
    
    #pid        logs/nginx.pid;
    
    
    events {
        worker_connections  1024;
    }
    
    
    http {
        include       mime.types;
        default_type  application/octet-stream;
    
        #log_format  main  '$remote_addr - $remote_user [$time_local] "$request" '
        #                  '$status $body_bytes_sent "$http_referer" '
        #                  '"$http_user_agent" "$http_x_forwarded_for"';
    
        #access_log  logs/access.log  main;
    
        sendfile        on;
        #tcp_nopush     on;
    
        #keepalive_timeout  0;
        keepalive_timeout  65;
    
        #gzip  on;
    
        server {
            listen       80;
            server_name  localhost brassaikao.hopto.org;
    
            #charset koi8-r;
    
            #access_log  logs/host.access.log  main;
    
            location / {
                #root   html;
                #index  index.html index.htm;
    
                proxy_pass http://127.0.0.1:7860; # Change this if your Gradio app running on a different port
                proxy_redirect off;
                proxy_http_version 1.1;
                proxy_set_header Upgrade $http_upgrade;
                proxy_set_header Connection "upgrade";
                proxy_set_header Host $host;
            }
    
            #error_page  404              /404.html;
    
            # redirect server error pages to the static page /50x.html
            #
            error_page   500 502 503 504  /50x.html;
            location = /50x.html {
                root   html;
            }
    
            # proxy the PHP scripts to Apache listening on 127.0.0.1:80
            #
            #location ~ \.php$ {
            #    proxy_pass   http://127.0.0.1;
            #}
    
            # pass the PHP scripts to FastCGI server listening on 127.0.0.1:9000
            #
            #location ~ \.php$ {
            #    root           html;
            #    fastcgi_pass   127.0.0.1:9000;
            #    fastcgi_index  index.php;
            #    fastcgi_param  SCRIPT_FILENAME  /scripts$fastcgi_script_name;
            #    include        fastcgi_params;
            #}
    
            # deny access to .htaccess files, if Apache's document root
            # concurs with nginx's one
            #
            #location ~ /\.ht {
            #    deny  all;
            #}
        }
    
    
        # another virtual host using mix of IP-, name-, and port-based configuration
        #
        #server {
        #    listen       8000;
        #    listen       somename:8080;
        #    server_name  somename  alias  another.alias;
    
        #    location / {
        #        root   html;
        #        index  index.html index.htm;
        #    }
        #}
    
    
        # HTTPS server
        #
        #server {
        #    listen       443 ssl;
        #    server_name  localhost;
    
        #    ssl_certificate      cert.pem;
        #    ssl_certificate_key  cert.key;
    
        #    ssl_session_cache    shared:SSL:1m;
        #    ssl_session_timeout  5m;
    
        #    ssl_ciphers  HIGH:!aNULL:!MD5;
        #    ssl_prefer_server_ciphers  on;
    
        #    location / {
        #        root   html;
        #        index  index.html index.htm;
        #    }
        #}
    }
    
    
  • 萬元搭建 Stable Diffusion 電腦

    萬元搭建 Stable Diffusion 電腦

    非 Nvidia 繪圖晶片可透過 DirectML 來使用 Stable Diffusion,缺點就是耗費記憶體。不過這對於CPU內建的繪圖晶片來說不是問題。直接在主機板設定把分享記憶體拉滿(16GB)即可。當然,內建的繪圖晶片也要堪用就是了。因此,幾經考量下,選用AMD 5600G配64GB DDR4 3600來搭建。

  • 透過 DirectML 讓 AMD 繪圖晶片也能夠跑 Stable Diffusion

    透過 DirectML 讓 AMD 繪圖晶片也能夠跑 Stable Diffusion

    微軟提供的 DirectML(https://learn.microsoft.com/zh-tw/windows/ai/directml/dml) 技術,是基於 DirectX 12.0 建構的機器學習框架,原則上只要能支援DirectX 12.0的繪圖晶片就能運作。以 AMD 繪圖晶片為例,只要是GCN架構(Radeon HD 7000)之後(含)的都可以支援。

    Stable Diffusion 使用的 PyTorth,是使用 nVidia 的 CUDA 語言控制運算資源。因此,才有了必須要 nVidia 顯示晶片才能運行的限制。好在目前已經有使用 DirectML 控制運算資源的 PyTorch with DirectML(https://pypi.org/search/?q=pytorch-directml)。再搭配網路大神們提供的 Stable Diffusion Web UI with DirectML(https://github.com/lshqqytiger/stable-diffusion-webui-directml),便能輕鬆實現運作。

    Note: 目前 DirectML 的效能大約介於純用 CPU 運算和使用 CUDA 之間,若是重度需求,還是建議直接用 nVidia 繪圖晶片